• Welcome to BirdForum, the internet's largest birding community with thousands of members from all over the world. The forums are dedicated to wild birds, birding, binoculars and equipment and all that goes with it.

    Please register for an account to take part in the discussions in the forum, post your pictures in the gallery and more.
ZEISS DTI thermal imaging cameras. For more discoveries at night, and during the day.

Help with editing this photo (1 Viewer)

JDV

Well-known member
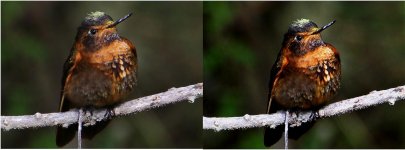
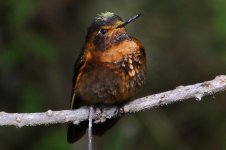
Im a novice at PS, but have a decent working knowledge of my way around it. Was seeking some tips on post editing a pic. The below example is the before and after. The edited photo looks somewhat better, but the highlites are blown out a bit. I believe I did a 100% crop first, then adjusted the levels, then smart sharpen just a bit, then curves to blacken it a bit. The 2nd pic is a 100% crop of the original in case someone wants give a stab at it and show me what I did wrong and what I could actually come up with. As always, thanx for any suggestions.
 

Attachments

  • HB.jpg
    HB.jpg
    68.3 KB · Views: 92
  • HB2.jpg
    HB2.jpg
    75.8 KB · Views: 95
Last edited:
It looks kinda strange to me.

Some smudging and / or over processing presumbaly by the camera to start with. Assuming you shoot .JPG and not RAW.

It seems to be over sharpened, so that could be your in-cam settings. It looks over saturated too... in-cam settings.

Some of the bird looks out of focus or it could be the smudging induced by the camera in its over zealous attempt to make what it thinks is a good photo based on your settings.

I would check what settings you have set in-cam, and calm them down a bit.

I didnt do much in the way of processing on the 2nd pic. Its already been harshly processed already, but have fiddled with Highlights / Shadows, slight destaturate, selective blur on the background.

Whether mine is any better is a personal thing though..
 

Attachments

  • HB2.jpg
    HB2.jpg
    170.4 KB · Views: 72
Hi this is my attempt on your photo

Things changed:

Sharpening altered, radius dropped from 1 to 0.3, and sharpening 150

Full noise reduction applied to background as a layer mask, strength 10, reduce colour noise 20%

Slight change on saturation and colour but nothing major

Apart from that, thats it, quick note, having a a pixel radius of 1 is too much most of the time, most of the time i wouldn't go above 0.3. Also your highlights are blown but there's nothing i can do about with the image you provided and your black's level is too high. You need to keep checking your levels.

Ryan
 

Attachments

  • HB2.jpg
    HB2.jpg
    293.8 KB · Views: 63
Thanx yall. The biggest barrier I face is the fact that Im color-blind. What looks over saturated to yall, looks acceptable to my eyes. I constantly have to have a family member or friend over my shoulder to interpret color saturation.

You said the original looked a bit oversaturated?? Really? To me it looked a bit bland. It may be my monitors. Other than a CD/DVD, is there any online monitor calibrator that you know of? At least to get me a bit closer than what my monitors settings are now.

In hind sight, I shouldve shot everything on my trip in RAW. I did shoot RAW on the last day of the hike so that I could correct any mistakes I made. And believe you me, I made a lot. I probably took 2000-2500 photos, of which maybe 10% are acceptable by my standards.

You mentioned the 2nd pic being harshly processed. Are you referring to the Jpeg compression by the camera, then when resaved after cropping in PS?
 
Last edited:
Warning! This thread is more than 13 years ago old.
It's likely that no further discussion is required, in which case we recommend starting a new thread. If however you feel your response is required you can still do so.

Users who are viewing this thread

Back
Top