


Paul Collins
Well-known member
Hello all,
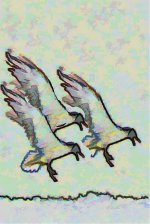
This was a picture that I did 2 years ago, when I was fifteen years old, of 3 black-headed gulls. I created it with various coloured inks, and a lot of water to create that blotchy effect. The heads and legs were painted in with grey watercolour paint.
To create the identical gulls, I drew a gull and then cut it out, drawing it three times on a sheet of paper. Some sections of the gulls are extremely similar due to this - i.e. the head and legs are the same. However, if you look at the wings, some of the colouring is identical. This was done by dribbling ink over the wings of one bird, and then pressing a cotton cloth down onto it. I left this to settle, and then lifted it onto the wing of the next bird, transferring some of the ink. (if you are interested in mimicking this idea, do not rely on this info too much, because I may have missed out a few details by accident).
Please give me any criticisms that you have.
Paul
P.S. This is not my normal style - I much prefer drawing with pen and ink in another manner.
Attachments
Last edited:
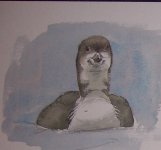

") If it is the grass then you need to put in some spikey bits overlapping the body that stand for blades of grass. Do some more and enjoy it |=)|
If it is the grass then you need to put in some spikey bits overlapping the body that stand for blades of grass. Do some more and enjoy it |=)|

