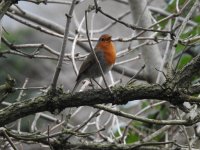
Assuming it is not the ISO problem that others pointed out, another problem you might be having is the camera is setting the speed (from the "A" mode) based on the light meter that is dominated by the sky background. The bird is likely much darker.
What I usually do is use M mode. Start with "A" and point the camera towards a neutral colored object and see what speed it says, then set that speed in M mode. If all you can find is a whitish object, set the speed a bit slower (like 1/3 - 2/3 stop slower) because the bird will be darker so you want more light.
Another way to do this is to use "A" mode as you suggest, but then set the exposure compensation to +2/3 to +4/3 stops, depending on how bright the background is compared to your subject. This tells the camera to take an automatica light meter reading, but then make the photo brighter by the given amount.
These same techniques apply for most shots with bright background, such as clouds, bright blue sky, sand, etc.
Marc
Another thing you can try is this, which is what many bird shooters user.
Set the camera to M. Set the shutter speed you want and the f-stop you want. For example, perching birds could be 1/125th at f/5.6 or f/8 (f-stop will depend on depth of field and that will vary depending on distance and focal length, etc.). Then use auto ISO. The camera will adjust the ISO for correct exposure. (you need to pick a shutter speed appropriate for hand-held vs tripod, and focal length and vibration reduction, etc.).
A variation on that is the bright backgrounds which I mentioned before. You can either user exposure compensation or the point-at-neutral-object and set it manually.
For BIFs, you likely want 1/1000 - 1/2000th and still at f/5.6 or f/8. But if you do not have bright lighting, you'll be pushing high ISO (1600 or above).
A useful way of thinking about shutter speed, f-stop, and ISO is by EV (exposure value). See something like
https://www.scantips.com/lights/evchart.html. The basic idea is a subject is illuminated with a certain amount of light, so you need to adjust the camera so it is OK with that amount of light. slower shutter speeds, smaller f-stops (larger apertures), and higher ISO decrease the needed subject illumination EV (they let in more light), and the opposites increase the needed subject EV (let in less light).
If you look at the
Tabulated values (wikipedia), you will see something like "Typical scene, heavy overcast" is EV 12. So you need to set the camera to let in that much light.
Let's say you know you want 1/1000th and f/5.6. From the giant table, "
EV as an indicator of camera settings", go to the f/5.6 column and down to the 1/1000th row. You will see that as ISO 100 (what the table is for), this combination is EV 16. So you need to gain 4 EV somewhere (16 - 12 above).
Each doubling of the ISO or halving of the speed gives a -1 EV (lets in more light). Each f-stop decrease (i.e. 1, 1.4, 2, 2.8, 4, 5.6, 8, 11, 16) also gives a -1 EV adjustment. So, for 1/1000th, f/5.6 on a heavy overcast day, you would need ISO 1600 (4 doublings from 100).
The EV system does not depend on the lens or the sensor. The f-stop already takes into account the lens focal length and aperture size.


")