shrek48
Well-known member
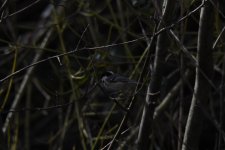
While mike is right about iso9000 high iso can be ok for record shots with some pp work, Nikon Z50 damn that is sharp !!
DSC_2842 by electric.mike, on Flickr


While mike is right about iso9000 high iso can be ok for record shots with some pp work, Nikon Z50 damn that is sharp !!

Well done Shrek, I am so jealous of the Long-tailed Tits. When I last came over in 2019 in May/June 2019 I was hoping to photograph those little beauties. I didn't see one I'm afraid. I didn't see a lot of birds that were common in gardens 20 years ago but sadly pesticides put an end to that. I did 3000 miles and the only bugs on the front of the rental car were Scottish bugs. Your garden must be full of bugsStroking the release has made a difference , I really was stabbing at it and had never noticed how jerky I was.. I seem to like the slightly darker pictures to the really bright ones !!
")
Thanks Mike, I already use back focus as normal focusing with shutter release was a nightmare for me. thanksOK Shrek, you'll either love this or hate this. My advice is try it and persevere with it for a while. I've done it all of my camera's for the last 16 years. I think it will help you with your focussing even more. The default for the focusing is a half press of the shutter release to focus followed by a full press to trigger the shutter. If you rush to get a shot you could miss the focus by triggering before it's fully focussed. There's a setting which won't trigger the shutter unless it detects that you are in focus or alternatively you can set it to focus irrespective of whether your focused or not. This is always how I set my AF-C Continuous Auto Focus on all my camera's. Getting back to Back Button Focussing as it's called you focus using your right thumb and trigger the shutter with your index finger as normal. If you set your focussing mode to AF-C and press the Back Button it will continuously focus at whatever is under your focus point until you release it. Because it's continuous AF it compensates all the time for movement of the subject. When you get the pose you want roll your finger over the shutter release and as your already focussed you'll get a better shot. You never need AF-S (Single Focus Mode) because you simply focus with the BBF (Back Button Focussing) on your subject then release the BB and it will stop focussing and stay where it was. This is handy for people standing still, you focus on their face for instance then you let go of the BB and recompose the shot and it stays in focus so simply press the shutter release.
Try it and give it a go. I think it will help. Heres a video on how to set it up on your D7200.
D7200 Back Button Focussing
Getting better all the time, but room for improvement.I think I may have just started to understand a tiny bit and have managed to change my ISO and get a few pictures I am happy with !
Thanks. Yes you are quite correct.Good points made Mike.
Pedantic sentence coming up .... Exposure Compensation / Bias is the action by which you can change the exposure. Exposure value ( EV ) is the setting you use, as you say - 0.1 -0.3 and so on or + 0.1 + 0.3 etc etc
Actually your Great Egret would be a good example for Shrek, what EV did you use for that or did you Spot Meter?Dead right mate - 0.3 / 0.7 etc upto 3.0 +/- on my D7000
I didnt need EV, so Spot meter, Aperture Priority and 500mm at F5 , ISO 400 ........gave me a shutter of 1/3200. Mind you it was lovely weather on the Somerset Levels that day
Used a Nikon D610 Full frame and Nikon 500mm F4 MkllView attachment 1372790