Hi Ted,
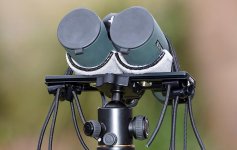
Playing around with the prototype, I'd say there is a potential for stronger shock cords to overcome friction in the bridge and mis-adjust the interpupillar distance.
I was planning on using 20/127" shock cords 3") , but am playing around with removable cable ties at the moment.
, but am playing around with removable cable ties at the moment.
Regards,
Henning
This won't secure the optics as well as individual barrel wraps, but I'll compensate with stronger 3\16" to 1\4" shock cords!
Playing around with the prototype, I'd say there is a potential for stronger shock cords to overcome friction in the bridge and mis-adjust the interpupillar distance.
I was planning on using 20/127" shock cords 3
, but am playing around with removable cable ties at the moment.Regards,
Henning