


Macswede
Macswede
We were supposed to head off for my local patch at Ågesta on Saturday but my wife had to take a 99 year old friend to the eye clinic at the hospital so she could have her eyes examined. She enticed me into walking with her to the bus stop by offering to show me the place where she had seen a pair of Goshawks last Wednesday. In the event we didn't see any Goshawks but a nice male Sparrow Hawk flew past very close. Of course it wasn't until he had gone that it occured to me that I had a camera with me that might have let me get a decent flight shot.
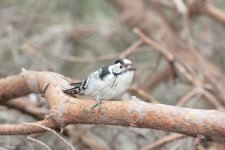
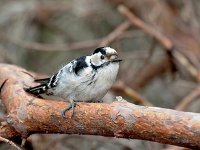
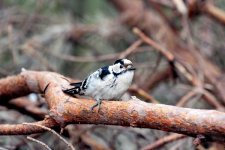
It was on the way back home that things got interesting. I saw a black and white bird pecking at some logs by the side of the path and realized that it was a female Lesser Spotted Woodpecker. I've never been that close, at least not while carrying a camera and I started firing away. She stuck around for quite a while, not leaving until a couple of joggers with a child on a bike in tow passed by. As I headed home, elated, I suddenly remembered with a sinking feeling that I hadn't readjusted the exposure compensation since photographing a pair of Hawfinches in the birch tree outside the window earlier that morning.
When I downloaded the pictures I thought some of them retained quite a lot of feather detail and might be saveable so I did my best to adjust levels and curves in Photoshop and and was quite pleased with the results. However, when I looked again yesterday morning I was a bit disappointed. I looked again yesterday evening and wasn't sure what to think.
So what do you think? Were the pictures saveable and, if so, did I do a good job of it. I realise I would probably have been better shooting in RAW but I feel I have enough to learn at the moment without complicating things even more.
I'm including one resized, uncropped original for comparison purposes and to let you access the EXIF information, plus 2 processed images. I'd be really interested to hear your opinions.
Graham.

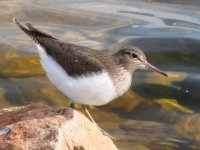
![Common_sandpiper[1] copy.jpg](/data/attachments/66/66682-8812b15117b687fbc0acbb1a5bff960b.jpg)