• Welcome to BirdForum, the internet's largest birding community with thousands of members from all over the world. The forums are dedicated to wild birds, birding, binoculars and equipment and all that goes with it.

    Please register for an account to take part in the discussions in the forum, post your pictures in the gallery and more.
ZEISS DTI thermal imaging cameras. For more discoveries at night, and during the day.

joined the Audobon club at last (1 Viewer)

aengus4h

Well-known member
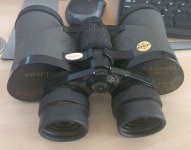
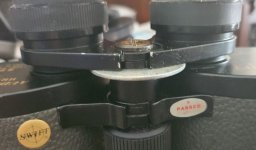
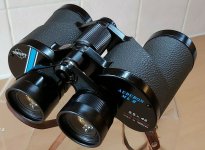
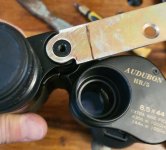
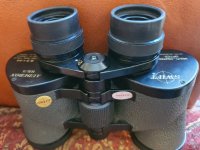
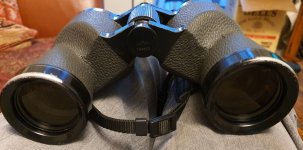
So I happened on a pair on the bay, in fair shape, paint wear but the body covering in good shape and case in very good condition. Reportedly focuses but one side always out. Stuck dioptre I thought so hit buy-now and nabbed them for a nice £25.

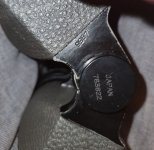
Roll on Saturday and they arrived and exactly as described, well almost. A quick try-out and the dioptre was wound all the way down, but it works fine?? Maybe the seller just didn't know to adjust it. So finding the focus wheel and dioptre are a little scratchy but reasonably smooth, outside to take a peek and they're good. Tested on the stars and collimation seems spot on.

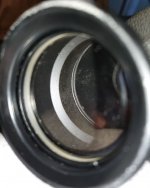
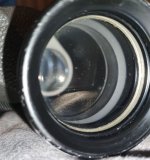
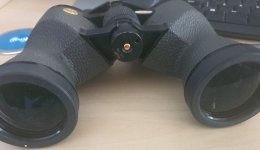
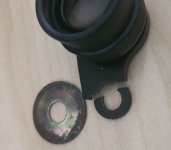
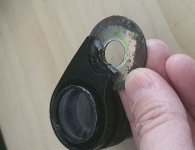
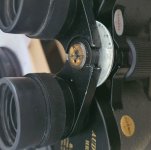
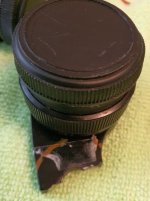
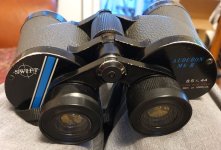
So very chuffed with the new bins. Looking at the objectives a possible trace of fungus on the inside which I'll deal with.
 

Attachments

  • Audubon mk2 EP end.JPG
    Audubon mk2 EP end.JPG
    107.1 KB · Views: 73
  • Audubon mk2 serial.JPG
    Audubon mk2 serial.JPG
    55.7 KB · Views: 52
  • Audubon mk2 objective end.JPG
    Audubon mk2 objective end.JPG
    108.7 KB · Views: 49
Decided on Sunday as the weather was lousy that I'd take a look at doing a quick clean-up. So stripped the top end down and removed the prism carriers. (pics before cleaning)

Dioptre ran fine after wiping down the grease so likely just a bit of grit. Inside the body looked a bit dirty, so with fungus in mind I went over it all with peroxide and then cleaned the lenses inside and out with Zeiss wipes. Didn't dismantle the eyepieces or the focus wheel, a job for another day when I'm ready to do a deeper overhaul I think.

Reassembled and wow the view is nice clear and sharp, checking against the stars that night and collimation remains good too :)

Will need to replace the eyecups I think, one cracked as I removed it and the otehr looks like it was cut to fit so maybe not originals.
 

Attachments

  • Top-end strip down.JPG
    Top-end strip down.JPG
    191.2 KB · Views: 73
  • Body LH Internal.JPG
    Body LH Internal.JPG
    81.6 KB · Views: 61
  • Body RH internal.JPG
    Body RH internal.JPG
    95.5 KB · Views: 56
  • RH objective.JPG
    RH objective.JPG
    53 KB · Views: 52
  • LH objective.JPG
    LH objective.JPG
    58.2 KB · Views: 45
Decided on Sunday as the weather was lousy that I'd take a look at doing a quick clean-up. So stripped the top end down and removed the prism carriers. (pics before cleaning)

Dioptre ran fine after wiping down the grease so likely just a bit of grit. Inside the body looked a bit dirty, so with fungus in mind I went over it all with peroxide and then cleaned the lenses inside and out with Zeiss wipes. Didn't dismantle the eyepieces or the focus wheel, a job for another day when I'm ready to do a deeper overhaul I think.

Reassembled and wow the view is nice clear and sharp, checking against the stars that night and collimation remains good too :)

Will need to replace the eyecups I think, one cracked as I removed it and the otehr looks like it was cut to fit so maybe not originals.

Well done!
Too many think that binoculars are untouchable, perhaps because so many just muck things up when they unscrew things.
This is a welcome report that actually tangible improvement is within reach even for (relatively) ordinary mortals.
Please keep us posted as to the tools you used and any issues you encountered. This forum has only a handful of people who have hands on optics experience, people such as WJC, Binastro, Jring, Henry Link and Surveyor, any additions will be wonderful.
 
aengus4h,

Nice purchase for the price, and now you have an even better glass after some cleaning, great job.

Andy W.
 
thanks guys. I didn't remove the objectives sine they're eccentric rings so I figure leave alone if possible and not upset the collimation by much/any. Makes it harder to clean internal side of the objectives but achieved via cotton buds in the peroxide and the Zeiss wipes assisted by careful use of a camel hair brush to make good contact across the entire surface.

Tools, well some good jewellers screwdrivers always help and good cross-head for the cover screws. Also a lens spanner, I've an adjustable one which was needed as in this pair the occular tubes are keyed, made removal a lot simpler than using a strap wrench and risking them going out of round. For the centre hinge screw I'm lucky enough to have a nice old woodworking screwdriver from my dad which works well.

Being honest I'm no wizard and compared to those experienced and expert folk am a beginner for sure. But I'm not afraid to have a look, patience is probably one of the most important tools in the box, start to rush it, use too much force or allow yourself to be distracted and... very easy to mess up. But if you do your research and know your limitations there's a fair amount you might be able to do. Getting collimation after tho, well that's another matter unless you've the gear and expertise. I don't but I've managed ok getting reasonable alignment and cross-check against the stars for final tweaks if I need to.

Gotta say I'm impressed at the build quality of these tho, very solidly made and the condition after all these years is testament to that.
 

Attachments

  • woodworking screwdriver.JPG
    woodworking screwdriver.JPG
    44.1 KB · Views: 43
Hi everyone.

So today arrived a pair of Audubon HR/5's, unfortunately the RH occular arm is broken at the hinge, and also the upper prism on that side has a slight chip at the end. Luckily the chip seems to fall outside the FoV. Seems that these have taken a knock or drop since there's a ding in the body under the cover plate as well as the dioptre holder not being secured.

The holder I was able to refit since the grub screws were still present tho the plastic body has a crack, likely from the drop. Unfortunately I expect being Audubon's the eyepieces are larger than other regular binos that I have kicking about for spares, will try a cross check in the coming days. So I guess I'm going to be in need of a spare arm or a way to repair it and maybe a prism if anyone has spares they're willing to offer?

Pics below hopefully show what I mean from the above description. Would be great to get these fixed up, view through them looks very good. They do need a serious clean which I'll attend to.

thanks
Dave
 

Attachments

  • broken arm dismantled.JPG
    broken arm dismantled.JPG
    88.3 KB · Views: 52
  • chipped prism internal view.JPG
    chipped prism internal view.JPG
    49.3 KB · Views: 34
  • Audubon HR5.JPG
    Audubon HR5.JPG
    47.5 KB · Views: 46
  • Audubon HR5 objective end.JPG
    Audubon HR5 objective end.JPG
    50 KB · Views: 29
Last edited:
Looking into the HR/5's a bit more, I'm thinking along the lines of a 2.5mm thick M10x30mm stainless penny washer to replace the broken section, cutting back into the solid arm and secured with a couple brass grub screws and epoxy.

Meantime, trying the idea out but under both arms, used a steel penny washer that has too big a centre hole (12.6mm), offset to allow the locator pin to engage the focuser slot.

And wow it works! both arms stay level and it can focus smoothly up and down. I know I've reduced the infinity side of the range now but they're usable till the stainless washers arrive and I can do a more permanent repair :)
 

Attachments

  • how about a washer.JPG
    how about a washer.JPG
    35.1 KB · Views: 29
  • need a 2.8mm thick one.JPG
    need a 2.8mm thick one.JPG
    22.4 KB · Views: 33
  • test1.JPG
    test1.JPG
    43.7 KB · Views: 31
  • test1a.JPG
    test1a.JPG
    42 KB · Views: 31
I have a pair of those coming next week. Here's a pic.

Nice looking :) I've always been very curious about the performance of those by current standards (the durability most likely exceeds current standards by and large). Keep us posted on the view through them, looking at them is a joy.
 
I had not looked through a pair of these since the mid 70's when a good friend owned them. I remembered them being on the heavy side but with their huge eyepieces I recalled that the image was incredibly bright. This week a young woman joined our local birding group and produced a pair which were close to fifty years old. Expecting them to be battered and bruised with somewhat reduced performance I was astonished to look through them and note that they were absolutely brilliant. Fantastic clarity and image.
 
That looks like a really clean example, rdnzl - fingers crossed they will be just as perfect inside, as I suspect the one ambduck looked through must have been, either by great good fortune or thanks to a well executed cleaning job. The best of Swift's old range still, IMO, have some great qualities, and Mr H.H. Swift was quite the visionary when he specified the 8.5x magnification. You may need to be a little more careful with it in the WA/Pacific Coast climate than in sunnier drier climes (us UK owners need to exercise similar car), but apart from that there's no real reason why your binocular won't continue giving good service for decades to come.

Aengus, how did the repairs go? Well done on getting into the Audubon club about as cheaply as one possibly can - and having the DIY skills that are almost certainly going to be needed when one buys such binoculars for £25!
 
I have a pair of those coming next week. Here's a pic.

Note that with a 445' field of view the apparent field will the 72.2º — virtually identical to the new Swarovski 8x42 NL Pure, which is 72.8º.

Good looking,
Ed
 
Looking into the HR/5's a bit more, I'm thinking along the lines of a 2.5mm thick M10x30mm stainless penny washer to replace the broken section, cutting back into the solid arm and secured with a couple brass grub screws and epoxy.

Meantime, trying the idea out but under both arms, used a steel penny washer that has too big a centre hole (12.6mm), offset to allow the locator pin to engage the focuser slot.

And wow it works! both arms stay level and it can focus smoothly up and down. I know I've reduced the infinity side of the range now but they're usable till the stainless washers arrive and I can do a more permanent repair :)

So coming back to this thread after a long gap... had a period of illness so everything stopped for a while

I decided the large penny washer idea just wasn't going to cut it, not enough overlap. So I used a steel angle and modified the end to suit before trimming it down to size. Was following a method posted on CN forum so can't claim credit for the idea, but the result after finishing the job was quite worthwhile I think.

Below pics show the stages, work the metal plate, file back the ally arm to accommodate the steel plate, drill and tap for securing screws. Then I used epoxy to fix the 2 sections together and also provide a moisture barrier so we don't start rusting later ;-) I drilled a dimple for the IPD marker dot too. Paint, white paint pen to bring out the IPD index and refit...
 

Attachments

  • broken arm before mod.JPG
    broken arm before mod.JPG
    52.5 KB · Views: 25
  • steel angle marked up.JPG
    steel angle marked up.JPG
    43.8 KB · Views: 18
  • test for fit.JPG
    test for fit.JPG
    48.8 KB · Views: 19
  • arm reworked and tapped.JPG
    arm reworked and tapped.JPG
    69.2 KB · Views: 23
  • arm top sprayed.JPG
    arm top sprayed.JPG
    54.3 KB · Views: 22
Last edited:
rest of the pics of the repair.

Focus now runs smooth at all IPDs and alignment seems fine too so these are usable once again. Not a perfect finish on the paint but good enough I think and am please to have succeeded.

Still to do a full strip down and internal clean of the optics and fix the crack in the dioptre eyecup but that'll be for another day and should go much the same as I did for the Audubon MK2's earlier in this thread.

Shame I can't do a glass repair on the spalled prism but what the heck, £20 and a bit of work for a very usable pair of HR/5's is a nice result ;-)
 

Attachments

  • arm sprayed showing securing screws.JPG
    arm sprayed showing securing screws.JPG
    54.9 KB · Views: 29
  • HR5 repaired.JPG
    HR5 repaired.JPG
    114.3 KB · Views: 33
Aengus: I like the way you repaired the ocular arm. I've taken a different approach to repair several arms, though I think your method has a better chance of surviving another shock than my method. After cleaning the broken parts, I epoxy bond the 2 parts together using glass fibers set into slots I cut with a thin abrasive disc on all four sides of the broken area on the arm. Managed 10 repairs that way and thus far (fingers crossed) none have failed. The binocs are usually treated gently after the repair so I can't vouch for their durability. Seems to be a weak link, that area of the focus mechanism. Regards, Pat
 
Warning! This thread is more than 4 years ago old.
It's likely that no further discussion is required, in which case we recommend starting a new thread. If however you feel your response is required you can still do so.

Users who are viewing this thread

Back
Top