• Welcome to BirdForum, the internet's largest birding community with thousands of members from all over the world. The forums are dedicated to wild birds, birding, binoculars and equipment and all that goes with it.

    Please register for an account to take part in the discussions in the forum, post your pictures in the gallery and more.
ZEISS DTI thermal imaging cameras. For more discoveries at night, and during the day.

Recovering underexposed photos (1 Viewer)

Eos9

Well-known member
United Kingdom
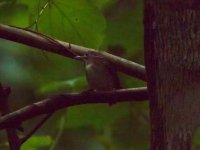
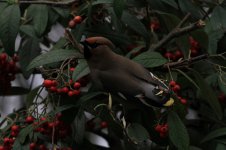
I recently took a few badly underexposed photo's (prob 2 - 2.5 stops under) as a result of inadvertently knocking the control dial to manual without realising.
I have taken the photographs in both Raw and Jpeg and was wondering if I can still get a decent photograph despite them being underexposed to this degree.
I only have Photoshop elements (ver 4.0 ) and Canons own software suite to play with ie Digital Photo Professional.
I have tried to get a decent image using the Canon software to open the Raw file and adjust the brightness / contrast etc accordingly.
Unfortunately although the brightness appears (ok-ish ! ) it does leave a very grainy looking image despite trying to reduce the noise etc.
I am not 100 % familiar with working with Raw images so at the moment I'm not certain whether I'm doing something wrong or if its simply a case of trying to flog a dead horse with an image that is too underexposed to get a decent result from.
Any help or advise therefore much appreciated.
 
Since no one more expert than me has replied, I'll offer a couple of suggestions.

I think you will be better off working on the raw files as they give you a little bit more latitude. Try converting one to a Tiff and then you will be able to open it in Elements 4.

Check the levels and, if necessary, move the righthand slider until it touches the righthand edge of the histogram. You could also try opening the shadows and highlights palette and moving the "Lighten shadows" slider.

If you think you're starting to lose some highlight details, have a play with the "darken highlights" slider.

To access both the levels and the shadows and highlights palettes, go to "enhance" in the main menu, then drop down to "adjust lighting" and the palettes are in a sub-menu along with brightness and contrast.

Having said all that, I think it's inevitable that "pushing" badly underexposed shots will result in increased noise.

Anyway, I hope this helps.

Malcolm
 
Last edited:
Having said all that, I think it's inevitable that "pushing" badly underexposed shots will result in increased noise.

That's certainly been my experience also. I think you're only recourse is to learn to live with the noise.
 
I'm reasonably adept at RAW conversion and post-processing, but it really depends on the specifics of the image as to whether a 2+ stop underexposed image (with lots of shadow areas?) can effectively be recovered.

A lot depends on the camera in use too: which one are you using, Eos9?

I've done some underexposure recovery tests with my 7D in the past - the attached show what might be possible: the original is over 3 stops underexposed (handheld at 1/25!), and the fixed image pushed back to +1 EC - a 4+ stop adjustment in total.

But a lot depends on the content of the image - this one doesn't have a lot of deep shadows to recover...
 

Attachments

  • IMG_2195_minus_3_ev.jpg
    IMG_2195_minus_3_ev.jpg
    249 KB · Views: 132
  • 2195_recovery.jpg
    2195_recovery.jpg
    293.5 KB · Views: 157
Last edited:
I recently attempted to photo a bird in very dark conditions without the option of any flash with my 7D and 400mm f5.6. The photo was taken in raw format at ISO 3200 and 1/500 handheld as I dared not go any slower. I also forgot to apply any ec at that critical moment.

I am really impressed with how much data the 7D actually manages to record and subsequent playing around with Adobe Camera Raw and photoshop allowed me to get a half-decent record shot from what initially looked like a complete blackout.

Nick
 

Attachments

  • IMG_0223.jpg
    IMG_0223.jpg
    27.8 KB · Views: 92
  • Processed.jpg
    Processed.jpg
    69.5 KB · Views: 124
Thanks for the info to date guys I'l try my best to recover these best I can.
The photo's were taken on a Canon 7D and I have attached an example of one of the photographs in question ( one underexposed Waxwing ! )
Whilst on the subject can anyone recommend any suitable noise reduction Freeware that might help ?

Eos
 

Attachments

  • U:E Waxwing_4783.jpg
    U:E Waxwing_4783.jpg
    274.6 KB · Views: 94
Just to encourage you that your photo's are recoverable EOS, the attached photo is a quick job I did with yours via photoshop.

All I did was increase exposure a tad over bright, then wound the brightness back with negative gamma correction.
Did Hue and Saturation adjustments. A tad increase for main, then a tad for yellow, tad for green and a tad for red (because green red and yellow seem the important colours in your photo.
Used USM very gently to sharpen a smidgin.
Reduced noise by reducing jpeg artifacts only.

Not a fantastic attempt, but I hope it encourages you to have a tinker and get something half decent from your waxwing photos.

Joe
 

Attachments

  • U_E%20Waxwing_4783.jpg
    U_E%20Waxwing_4783.jpg
    115.9 KB · Views: 81
It's amazing what can be done.

Last year I'd been shooting on manual on my trip to Sinai. The next day we were picked up in full darkness for the drive up to St Katherines, where we arrived before daybreak. Just as we got there in the dawn dimness I saw my first ever white-crowned black wheatear from the taxi and I asked the driver to stop. I started firing off, and it wasn't until a few minutes later that I noticed that the replay on my 40D screen was entirely black. I didn't work out why until a few minutes later as we drove on.

A photo of a Tristam's Grackle five minutes later is a bit underexposed at ISO800, 1/500, F5.6 to give an idea of what my exposure should have been.

I took the shot below at ISO400, 1/2000, F7.1. It was about 4 or 5 stops underexposed. I've only done a slight amount of adjustment to get the image below from something that looked totally black in the original. Doubtless a bit more adjustment could improve it further. No sharpening or noise reduction used.

I've only kept the original image as an example. We saw loads more in great light shortly afterwards.
 

Attachments

  • W C B Wheatear (1) copy.jpg
    W C B Wheatear (1) copy.jpg
    129.8 KB · Views: 76
Last edited:
Another technique that I find very useful for bringing up exposures in shots without as much tuning of highlights/shadows, loss of contrast, or loss of color fidelity is to use 'layers' in photoshop, and stack those layers using the 'screen' blend mode. If you take a photo, even in JPG, then go to the layers tool and choose 'duplicate' layer...you will end up with two identical layers of the same shot. There is a blend mode right next to the layer, and photoshop type programs usually have a blend mode called 'screen'. Switch it to 'screen' and keep opacity at 100%, and you'll see the exposure improve dramatically. If too bright, drag the opacity down from 100% until it looks good. If it's still not bright enough, make a second duplicate layer with screen blend. I've used as many as 4 screened duplicate layers to recover exposure 3-5 stops on JPGs and still had usable results. This was shot as JPG only, and was recovered 5 whole stops using this method:

http://www.pbase.com/zackiedawg/image/133529240/original.jpg

I don't have the original, but the bird was essentially a full silhouette - I had missed the metering and hit the highlighted background. Most people would tell you only a RAW could be recovered that much...but you'd be surprised what detail is hiding even in a JPG.
 
Warning! This thread is more than 13 years ago old.
It's likely that no further discussion is required, in which case we recommend starting a new thread. If however you feel your response is required you can still do so.

Users who are viewing this thread

Back
Top