• Welcome to BirdForum, the internet's largest birding community with thousands of members from all over the world. The forums are dedicated to wild birds, birding, binoculars and equipment and all that goes with it.

    Please register for an account to take part in the discussions in the forum, post your pictures in the gallery and more.
ZEISS DTI thermal imaging cameras. For more discoveries at night, and during the day.

Why can't I take a sharp photo? (1 Viewer)

NoSpringChicken

Well-known member
United Kingdom
I have a cheap digiscoping system comprising an Acuter 65mm scope and a Fuji F30 camera.

So far the results have been a bit disappointing. Although the exposure is normally good I have been unable to produce a single really sharp photo. I realise this may be due to the limitations of the scope but I wondered if there is anything I am doing wrong.

I locate the camera by attaching it to the mount, switching it on and then moving it backwards or forwards until the vignette has a nice crisp edge to it. This is about 5mm from the eyepiece. A small amount of zoom on the camera clears the vignette. Is this the correct procedure?

I use the aperture priority mode on the camera and normally choose the widest aperture setting, although this is limited in the telephoto position.

I normally use the Multi (Pattern) metering and Spot focussing modes. Is this correct?

I use the Macro setting (5cm-80cm although this is limited to 30cm-80cm with the zoom). I don't think there is an Infinity focussing setting on the F30. Is this correct?

To take a photo, I focus the scope by viewing the camera's lcd and using a magnifying glass lens. I use the 2 second timer on the camera. I have read that it is normal practice to refocus the scope with the shutter button depressed halfway but this is not possible when using the lens. Could this be the problem?

I still don't understand what the camera is focussing on with the autofocus. Is it the eyepiece lens or the focussing point of the image, wherever that is?

Finally, on a quick scan I can't find the maximum permissible size of attachments as I could attach a couple of sample photos.

Any help would be most welcome.

Ron
 
Could you tell me the maximum size for attachments and I will post a couple of sample pics.

The success rate varies, as using the timer means that the subject often moves just before the shutter fires, but I suppose 10-15% are not completely hopeless.

Ron
 
The attached thread maybe of interest to you

http://www.birdforum.net/showthread.php?t=63184

It explains that I went throught the same fustrations as you with general digiscoping and may offer some help and support. Without using the eaxact same set up as you I can only suggest that in addition ot the advice above the main thing I have learn't is that of the images I take in a session (about 100 per hour in good light) I keep about 10% and am pleased with 2-3%. I have not met many who have a higher success rate than this with bog standard set ups.

I am sure someone with F30 may offer more specific advice for you too.
 
Ron,
Watch the little green light under the zoom switch as it will be steady if the camera is in focus. If it's flashing something is not right. Also the camera needs good contrast to focus on . I often use the birds legs or a branch as often a white/light colored bird is difficult to focus on. Also images usually need a bit of sharpening in Photoshop , particularly after reducing. i did a quicky adjustment on one of yours. Don't expect a large number of keepers. 10% would be good for birds and 5% is more normal. Neil.
 

Attachments

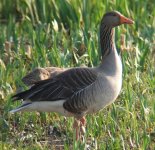
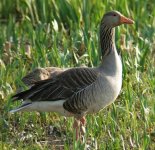
  • goose.adj.jpg
    goose.adj.jpg
    274.5 KB · Views: 305
Thanks Neil. The reworked photo certainly has a lot more impact than the version I posted.

I do normally apply a bit of sharpening in Photoshop but I didn't do so after resizing the image this time. Out of interest what default value do you use for Unsharp Mask? I normally use 100% for the Amount, 1.0 for the Radius and 0 for Threshold.

Did you adjust anything else, such as Contrast or Levels?

Ron
 
Ron,
I usually look at Auto Levels or Auto Color first to see if I like the look. If they are too far away from what I want I do manual Levels adjustment , a bit of Contrast and Shadows/Highlights. For yours I did Auto Color. I Unsharp Mask the full image after adjustments around 120/1/4 and then again after reducing for Email with 60/.6/0. I like to keep things simple so I set up an Action do this and check the end result. You can go back and change things in CS2 if you don't like it.
Neil
 
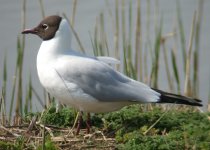
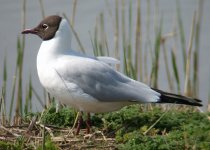
Looks like you can take sharp photos with your kit Ron. Gull looks particularly good; maybe the very fast shutter speed was a factor? Hope the advice above is a help to you.
Have attached some edited versions (bet you know the script : look OK to me now but will probably look terrible tomorrow |:D| )
All the best.
 

Attachments

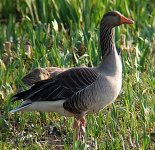
  • goose2.jpg
    goose2.jpg
    183.2 KB · Views: 200
  • gull2.jpg
    gull2.jpg
    86.9 KB · Views: 240
Looks like you can take sharp photos with your kit Ron. Gull looks particularly good; maybe the very fast shutter speed was a factor? Hope the advice above is a help to you.
Have attached some edited versions (bet you know the script : look OK to me now but will probably look terrible tomorrow |:D| )
All the best.

I have to say I thought the original were quite good, but the work you have done on it is truly very good. Just shows that when you know how to use software correctly it is very helpful.
 
Ron, like you I also have the F30, and find that many of my shots lack really sharp focus, even through a Swarovski 80 HD. Your shots straight from the camera seem as sharp as mine using the same settings.

I don't use the macro setting (little yellow flower symbol) though have experimented with it on occasion. My best solution has been to reel off lots of pictures, in the hope that I get a few sharp ones, and hopefully when I really 'need' a good shot the practice will have paid off for me. The only thing I am becoming sure of with time, is that it is essential to have the bird in the centre of the image when focussing, to ensure the sharpest possible image. Depth of focus is so shallow with digiscoping, that if the main subject is even slightly off centre the AF will latch onto the wrong part of the image, resulting in loss of sharpness. This is certainly so with moving subjects, though both of your pictures seem to be frame-fillers, so sharpness should be less of an issue.

I personally use Picasa to sharpen most of my pictures, though really wish I didn't have to.
 
Last edited:
Thanks for your help Norm, they look really good now. I will have to get to work with Photoshop on some of the other pics.

I feel much more optimistic now.They don't look too bad for a scope which cost less than £140 including a zoom eyepiece do they?

If only birds would keep still! It's amazing how fast they move just drifting on the water when viewed through a scope.

Ron
 
I don't use the macro setting (little yellow flower symbol) though have experimented with it on occasion. My best solution has been to reel off lots of pictures, in the hope that I get a few sharp ones, and hopefully when I really 'need' a good shot the practice will have paid off for me. The only thing I am becoming sure of with time, is that it is essential to have the bird in the centre of the image when focussing, to ensure the sharpest possible image. Depth of focus is so shallow with digiscoping, that if the main subject is even slightly off centre the AF will latch onto the wrong part of the image, resulting in loss of sharpness.

Interesting, Steve. I think I will take some comparison shots with and without the macro setting to see what difference it makes.

I have been concentrating on keeping the AF frame directly over the subject recently and it does help. The main problem is that there is so much to remember to do before the bird moves out of position. This isn't helped by the weight of the adapter and camera which upsets the balance of the scope so that it tends to move a fraction of a millimetre after locking into position. I had thought about using a counterbalance weight at the other end but I don't really want to carry any more weight round with me.

It sounds like the real secret is lots of practice and plenty of shots.

Ron
 
Ron

Dissapointing NOT

Amazing pictures, you will always have to Photoshop especially for sharpness.

"Practice makes perfect" well yes it helps, but we always need that bit of luck too.

Malc
 
The problem you describe re:balance is a common one with digiscoping. I've recently been using a Velbon FHD-51Q, which has a built in sliding plate, allowing the complete scope/camera/adapter setup to be balanced perfectly. I'm not saying it's the perfect head, as there are much heavier heads that do a better job (eg: Manfrotto 501), but you'd be amazed at how much easier it is to track a moving subject when you haven't got a front or back-heavy setup to wrestle with. Having enjoyed using the Velbon, I'm now considering attaching a similar Manfrotto MN357 Sliding plate adapter to my usual 128LP Manfrotto head. A little more weight, but hopefully easier shooting. If the set up is balanced to start with, you get much less 'scope bounce' when you do lock up the head for the final picture.
 
Hi Ron,

Your second photo of the Gull looks very nice to me.

Perhaps when your home you could take time and shoot photos of an object at a fixed distance using manual focus mode on the camera until you get the best photo you can. It would give you an idea how well the scope is performing. You could try this in different lighting.

If you go to a crafts section of a department store they usually sell these little colorful birds the size of a sparrow and smaller. They have some real feathers on them (chicken I think) that would give you areas to focus on. It may look a little strange to the neighbors :)

You could also search the gallery here on birdforum for your scope in the photos section since equipment is one of the fields of a photo, if you get some hits you can look at other peoples photos to give you an idea.

See ya,
 
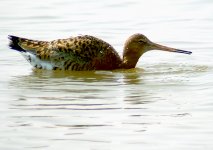
I've been having a little play with Photoshop. I had a bit of purple fringing to sort out on this one as it was quite strongly backlit and there was a lot of bright water about.

At least I'm getting a bit of definition and texture in the feathers now.

It is a Black-tailed Godwit, isn't it? I'm still very much a beginner at this birding game.
 

Attachments

  • Godwit.jpg
    Godwit.jpg
    403.6 KB · Views: 278
Last edited:
Thats a beauty Godwits are my favorite and you have a good one there. How far away was it?

For the balance issue you might look at the Swarovski balance rail I use it succesfully.

Keep up the good work and lets see some more lovely waders
 
I understand that you may not want to place the camera really close to the eye-peice (stratching etc), but the closer you get the better. The more light you let in between the camera and the eye-peice the 'foggier' the pictures are. I am sure somebody with a bit more technical knowledge may be able to offer an explaination as to why.

I use a mount/bracket/clamp thingy with my Canon camera, and the way the camera focuses, it locks if it is too close to the lens and touches, because there is no freedom to move. If I hold the camera manually to the eye-peice I get a lot clearer, brighter images. Downside is, I only have 1 pair of hands :-(
 
Warning! This thread is more than 17 years ago old.
It's likely that no further discussion is required, in which case we recommend starting a new thread. If however you feel your response is required you can still do so.

Users who are viewing this thread

Back
Top