Hi Joe,
I don't think things are that different if you are using a single mic. If this is routed to the LR recording and the balance is set to centre, then you will record two equal tracks (in effect dual mono). The trim and gain will them work as Mono described very well above.
The same is also true if you add additional mics and create a LR mix in the field. In this case you can set the balance for each mic (to adjust the ratio of signal split between the left and right tracks). The trim and fades would then control the mic levels. In this case you probably will want the main subject to be as close as possible to -3dB, but other parts of the mix to be substantially lower (so not as to drown out the main subject).
Setting the trim based on the maximum sound levels and fading down is easier when you are recording instruments or voice and can do sound checks. In the dynamic and transient world of wildlife recording, I tend to 'guess' a trim level than use the faders in the field. If you try to set trim and then adjust fade when you find a subject, it may well have stopped vocalising of moved by the time you finish adjusting settings!
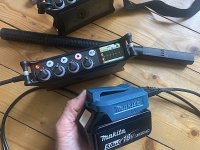
The slight complexity with my recorder (not an F6) comes if I want to record multiple tracks but do not want to combine them in a LR mix in the field. As I understand you are only using the one mic for the moment, it is probably best to ignore all the blurb below for the moment. With my recorder, if I am recording to separate tracks, then I can set the trim of the mics, but the faders don't work. Looking at the block diagram for the F6, I think this may also be true for your recorder. The diagram below is from the F6 user manual and shows that the trim (yellow) is on all lines, but the TR1-6 Faders and LR Fader (both green) only affect the LR tracks and the Line Out and Headphones. Tracks 1,2 and 5 and 6 do not have fader control. As Mono described, the headphone monitoring can either be pre or post faders, as highlighted in blue. Pre-fader would allow you to check the source and post fader to monitor the left-right recording mix, being recorder to you SD card.
View attachment 1390398
I understand the situation is slightly different in the F6 32bit float recording mode. In this mode, I don't think you set trim in the same way. Instead by default you set the recording levels and faders with the same knobs, with the knobs setting recording levels prior to pressing record, and setting the faders during recording (see text box in extract of diagram below, which points to the recording levels and faders).
View attachment 1390405
I think the basic logic of not having the faders on the individual tracks, is that you set the levels for a track with trim or recording levels, and control the mix with the faders.
As the F6 is one of a select few 32-bit float recorders, if you use this mode the recording levels are more forgiving, so if you set the recording levesl too high you can get away with it. I have read somewhere that in theory 32 bit float provides headroom to record up to 1500dB (Krakatoa was the loudest noise every recorded at 310dB, so a noise this loud, would probably be enough to not only to destroy you and your recording gear, but also all life on earth!). The F6 apparently warns if the signal is greater than +2dB. As 3dB is circa a doubling of sound level, you have quite a lot of wiggle room if you set the recording level too high and go above 0dB. In this case you would load the 32bit file into your post production software and reduce the level to -3dB without loosing any information or having any distortion. The only problems with 32 bit float and high sampling rates is that the file size is large and that battery life is reduced.
With regard to your question on software, lots of people use Audacity for simple recordings, which is free. For multi-track work, Reaper is modestly priced, and seems to work well, although it takes a bit of study to understand. If you are doing lots of video work and have a subscription with Adobe to use Premier Pro, then I understand Audition interfaces well, but this is a more expensive option.
Apologies for making things so complex, but your recorder is not a simple 'twiddle the gain and press record' option.
Regards
Jon Bryant


")