By the number of threads in the Micro Four Thirds forum I would imagine the system is still very much in it's infancy on takeup (possibly dictated by choice of suitable available birding lenses), but to help new users such as myself, established users, and potential adopters, I thought it might be a nice idea if we could have a thread to share some images to show the capability of the system, and also detail the technique and settings used, pitfalls to avoid, and any tricks etc, to get the best out of the system for bird photography.
I myself am very much still learning, and come from a superzoom setup used fairly basically to collect record shots, where I am now hoping for a better grade of record shot, without the bulk of a DSLR, and am wanting to learn a bit more about proper photography techniques.
The thread idea could fall flat on it's face") but hopefully some useful stuff can be shared :t:
but hopefully some useful stuff can be shared :t:
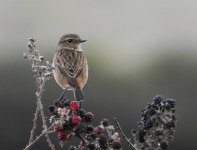
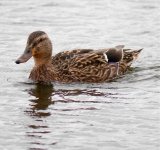
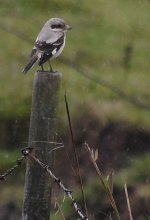
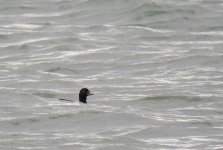
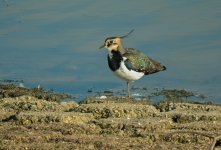
As my contribution I add the following:-
My setup:-
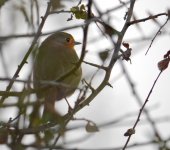
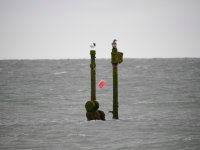
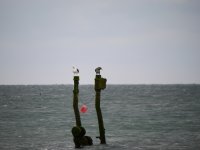
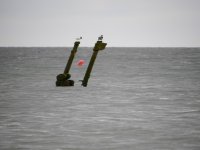
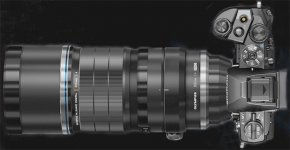
Panasonic G6 with Panasonic 100-300mm lens (2x crop factor giving 35mm equivalent of 200 – 600mm), and I use a Hoya HD protector filter. I also use a Roesch Feinmechanik lens collar for tripod mounting.
Settings:-
I use the camera in shutter priority mode, so far only using JPEGs, set to highest quality/largest size with noise reduction set to -5 to get the most untouched JPEG I can from the camera. I use burst mode M to maintain live view. Metering is set to spot metering, and I use colorspace AdobeRGB.
I use continous focus mode, and choose to use back button focus. For most shots I use 1-area centre focus, except for flight shots where I switch to multi-area focus.
I have found the electronic shutter to be brilliant for silent shooting in hides, but when in the open, buffeted by wind, I have experienced the effect of rolling shutter distortion, so now switch to mechanical shutter for everything other than hide based, and maybe tripod mounted shots.
The following settings I have turned off: iDynamic, iResolution, red eye removal and ISO limit set.
To set back button focus and switch between modes as described above I set the main customisable function buttons as follows:-
Technique:-
Obviously you want to take the camera down from your eye as little as possible when taking the pictures, so the above settings seem to work quite well so far (once you commit to memory where things are), although this could be a work in progress as I have changed a few things as I have gone along already, but the way the above settings can work is as follows:-
Any further contributions, pointers, questions, images etc most welcome :t:
I myself am very much still learning, and come from a superzoom setup used fairly basically to collect record shots, where I am now hoping for a better grade of record shot, without the bulk of a DSLR, and am wanting to learn a bit more about proper photography techniques.
The thread idea could fall flat on it's face
but hopefully some useful stuff can be shared :t:As my contribution I add the following:-
My setup:-
Panasonic G6 with Panasonic 100-300mm lens (2x crop factor giving 35mm equivalent of 200 – 600mm), and I use a Hoya HD protector filter. I also use a Roesch Feinmechanik lens collar for tripod mounting.
Settings:-
I use the camera in shutter priority mode, so far only using JPEGs, set to highest quality/largest size with noise reduction set to -5 to get the most untouched JPEG I can from the camera. I use burst mode M to maintain live view. Metering is set to spot metering, and I use colorspace AdobeRGB.
I use continous focus mode, and choose to use back button focus. For most shots I use 1-area centre focus, except for flight shots where I switch to multi-area focus.
I have found the electronic shutter to be brilliant for silent shooting in hides, but when in the open, buffeted by wind, I have experienced the effect of rolling shutter distortion, so now switch to mechanical shutter for everything other than hide based, and maybe tripod mounted shots.
The following settings I have turned off: iDynamic, iResolution, red eye removal and ISO limit set.
To set back button focus and switch between modes as described above I set the main customisable function buttons as follows:-
- Fn1 AF mode
- Fn2 AF/AE lock (back button focus button) (also set AF/AE lock to AF–ON, and Shutter AF is OFF)
- Fn3 Electronic shutter on/off
- Fn4 Quickmenu (moved down as it is more convenient for me to have the focus buttons high up near the shutter button area for quick use)
Technique:-
Obviously you want to take the camera down from your eye as little as possible when taking the pictures, so the above settings seem to work quite well so far (once you commit to memory where things are), although this could be a work in progress as I have changed a few things as I have gone along already, but the way the above settings can work is as follows:-
- Set your desired shutter speed using the scroll wheel (so far I stick to around 640 to match the lens length, although may go higher or lower based on conditions and technique over time, but this seems an ok starting point) The camera remembers the last speed used.
- Hold Fn2 to focus, release if you want to lock the focus. Press down again to refocus as desired.
- Alter exposure if required using the function lever
- Press shutter button to take picture
- To change quickly to flight shot mode dab Fn1 and use the scroll wheel one click to change focus mode to 23 point, the shutter button selects the mode
Any further contributions, pointers, questions, images etc most welcome :t: