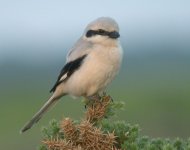
Neat Image, Irfan view etc.
Hi,
The real value of NeatImage is to remove "noise" from digital images. Noise appears as a granular appearance when part of an image is cropped and then enlarged, or when an image is shot at a hight iso speed, or when poorly lit and then adjusted in a software program. Neat image itself has a number of optrions, so you have to read the instructions carefully to avoid overdoing the smoothing out. I think the noise reduction, if used carefully, gives a better result than Photoshop 5 or Elements2 (I have both).
Irfan View is a freeware program primarily to view, store and catalog images on the computer, but it's pretty versatile, ans you can use it for slide shows etc. There are also some basic editing tools, including changing the brightness ("gamma"), contrast, and sharpening. If used carefully, in no more than 10% increments, the shapening tool is excellent - again, as good as unsharp mask in Photoshop. However, all the tools in this program only apply to the whole image. As in Photoshop, sharpening should be applied as the last manipulation, particularly after re-sizing an image.
Try your parakeet again, using IrfanView to slightly increase the contrast, decrease the gamma, and then sharpen by about 10%. Then apply NeatImage to just minimally remove digital noise. Save as a "filtered-bmp" file (which NeatImage does by default) and re-save as a .jpg, and if necessary, re-sharpen by no more than 10% again in IrfanView.
Hope this helps.


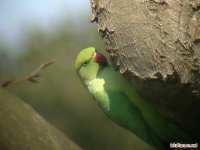
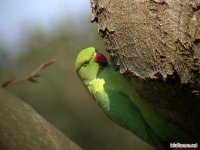
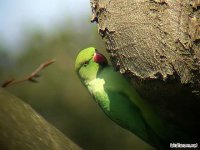
") . I did try your suggestions but didn't like what I was seeing in Irfanview. Either your use of Neat Image saved the day or, more likely, it was down to me being heavy-handed again.
. I did try your suggestions but didn't like what I was seeing in Irfanview. Either your use of Neat Image saved the day or, more likely, it was down to me being heavy-handed again.