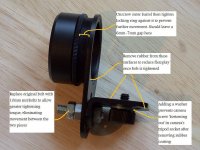
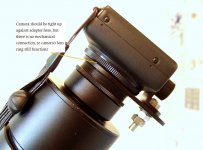
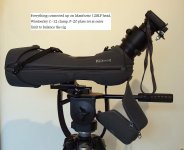
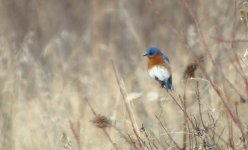
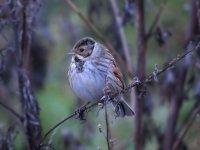
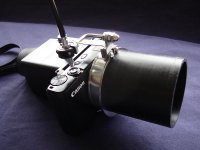
Hi Roger, they look good for digibinning. I found that the S95 works well through my bins too, and the extended lens fits very snugly into the eyepieces of my Nikon HGs, meaning less risk of scratching the glass than my old camera which has a smaller diameter lens.
For anyone setting up their S95 from new, particularly with digiscoping in mind, here are my current settings, which I use most of the time. I’ve annotated them with notes on changes that I might need to make depending on conditions/light etc.
Some settings are probably of no relevance for digiscoping (e.g. AF-assist Beam, so just ignore)
These are all set up in the C-menu (custom) on the mode dial on top of the camera. For more general shooting (not digiscoping) I’m usually in AV-mode (aperture priority). You can save settings here too!
Remember to keep re-saving these settings once set up, as the camera will revert back to settings from the last time the camera was switched on if you forget. Also, keep changing and re-saving them during a shoot if the light changes and you need to make changes to ISO, lens zoom etc.
To save settings, click on the Menu button, then in the camera icon menu (left menu), go to the bottom (quicker to click 'up' once) then use the FUNC SET button to save.
Camera Icon Menu (press Menu button once to access, then scroll up or down using the rear wheel)
AF frame: centre
AF Frame size: Normal
Digital Zoom: off (usually)
AF-point Zoom: On (* see below)
Servo AF: Off (might be useful for moving birds such as swimming ducks?)
AF-assist Beam: On (makes no difference for digiscoping?)
MF-point Zoom: On (works like AF-point zoom, but in manual focus mode. See asterisk below)
Safety MF: On (haven’t explored this yet)
Safety Shift: Off (from what I’ve read this might be useful, as I think it over-rides the aperture setting selected if for e.g. light is low and shutter speeds are too low to prevent blur. I presume it then opens the aperture from e.g F4 to F2.8)
IS Mode: Continuous (seems to be some benefit using IS even on a tripod in breezy conditions, though the jury is still out on its real usefulness for digiscoping)
*This is a brilliant feature. Just discovered it! If you half-press the shutter button and hold it down, the central area of the screen is magnified, allowing fine-tuning of the focus before pressing down fully. This is especially good when photographing birds that are partly obscured by branches/grass etc , or birds in a flock where you want a particular bird in focus. When the AF locks onto something else in front of/behind the target/bird you can fine-tune the focus using the scope’s focus before pressing the shutter fully. The enlarged centre of frame makes it easier to check focus
Tools Menu: Access by pressing Menu button, then clicking right on rear control wheel. Can’t see much here that would have much bearing on digiscoping
‘FUNC SET’ Menu (press button in centre of rear dial to right of screen)
DR Correction: Off so far, though might be worth exploring in challenging light such as backlit birds?
ISO 400 (as default, but higher or lower depending on available light. Up to ISO 640-800 is very useable, haven’t gone above that so far)
White Balance: AWB usually, though again, have altered this to other settings such as ‘Custom’ and even ‘Tungsten!’ for outdoors-basically whatever looks best to your eyes. Only for JPEGs though & won’t affect RAW.
My Colours: Off (better to alter in post processing)
BKT (bracketing): Off (so far not tried)
Continuous Shooting: (usually) You can shoot over 20 JPEG&RAW shots at the rate of about 2 per second in sequence, using a fast SDHC card, before the buffer starts to jam up. This happens quicker using a slower card (after perhaps 6 frames or so, which is better than many DSLRs)
Metering: either Evaluative or Centre Weighted Avg for close birds. For more distant birds Spot Metering could be useful
Aspect Ratio: 4:3 though this is personal
Quality: L (or RAW, or both) Pressing the DISP button after selecting these options allows you to tiggle between FINE and NORMAL quality
Other Useful changes that will need to be altered frequently can be accessed by pressing either the top, bottom, left or right side of the Large Control Wheel that surrounds the FUNC SET button.
LEFT: toggles between Normal AF, MF and Macro (I use Normal mostly)
RIGHT: controls flash functions. I always have this Off
TOP: toggles between aperture (F number) and EV Step-this allows you to adjust aperture in smaller 1/3 stop increments
BOTTOM: controls the self timer. You can adjust the duration of the timer using the front lens ring (0-30 sec) and the number of shots taken each time (1-10 burst, at about 2 frames/sec) using left/right on the control wheel
Another useful feature is that you can switch the camera on to view images by pressing and holding the review button (arrow inside rectangle), and therefore bypass the on/off switch and thus avoid extending the lens unnecessarily.


")