• Welcome to BirdForum, the internet's largest birding community with thousands of members from all over the world. The forums are dedicated to wild birds, birding, binoculars and equipment and all that goes with it.

    Please register for an account to take part in the discussions in the forum, post your pictures in the gallery and more.
ZEISS DTI thermal imaging cameras. For more discoveries at night, and during the day.

Manual mode for Birds in flight (1 Viewer)

Roy C

Occasional bird snapper
Thanks to some of the BF members I decided to switched to manual for BIF a few months ago and must say I am well happy with the results. The old problem of birds flying through ever changing background (e.g. dark trees and bright skies) has now been eliminated and correct exposure in general is a lot easier to achieve. I always had a particular problem with dark birds (typically common Buzzards on my patch) when they were small in the frame – even using EV +2 would still result in underexposure, now using manual it is a lot easier to get correct exposure.

My simple method of using manual is to meter off something around 18% Grey (like medium grass in the ambient light) and after dialling in the results in manual (using the same ISO of course) .I then adjust depending on how much darker or lighter the target is to 18% grey.

Has anyone got any tips/techniques that I could use to further hone my manual skills? – How about handheld light meters, would they be a big advantage for bird photography? (Never used on in my life).
Has anyone ever seen or produce a list of common birds and their tone in relation to 18% Grey?
Thanks Roy C
 
Last edited:
Roy that is how I have always done it, I never had good results using any other method other than manual. Like you I take a reading of the grass and then point skywards, I very rarely have to change anything unless the light changes in which case I quickly point at the grass again and check the reading. I even do this if I am near a pond or pool if there is no grass I squint until I find something that looks close to grey, eg. gravel paths.

I do have an old handheld light meter but the time it takes to take readings and transfer them to the camera, the shot has gone its much quicker to do it with the camera.
Thanks for the reply Christine, looks like we may be doing it right as no one else has come up with anything better :t:
Re the squinting to get something close to Grey, I did read somewhere where a good idea is to throw the focus out on an object to get a better idea of its tone, might give it a try.
 
Has anyone got any tips/techniques that I could use to further hone my manual skills? – How about handheld light meters, would they be a big advantage for bird photography? (Never used on in my life).
Has anyone ever seen or produce a list of common birds and their tone in relation to 18% Grey?
Thanks Roy C
Meter off the palm of your hand and expose at + 1 1/3 stops (give or take) from that reading - so long as your palm is in the same lighting as your subject. Your palm is a grey card (OK, pink card) + 1 1/3 stops. The advantage is, unlike grass, you should nearly always be able to locate your palm. Just make sure you fill the viewfinder with palm or use spot/partial metering.

See my post here - http://www.birdforum.net/showpost.php?p=1194275&postcount=44

As far as I am concerned, metering off your palm + 1 1/3 stops is just as effective as metering off a grey card at 0. The important thing is that each has a known reflectance and you can calibrate your exposure to that known figure. That makes a grey card and/or a palm every bit as effective as an incident meter and one hell of a lot cheaper.
 
Last edited:
Meter off the palm of your hand and expose at + 1 1/3 stops (give or take) from that reading - so long as your palm is in the same lighting as your subject. Your palm is a grey card (OK, pink card) + 1 1/3 stops. The advantage is, unlike grass, you should nearly always be able to locate your palm. Just make sure you fill the viewfinder with palm or use spot/partial metering.

See my post here - http://www.birdforum.net/showpost.php?p=1194275&postcount=44

As far as I am concerned, metering off your palm + 1 1/3 stops is just as effective as metering off a grey card at 0. The important thing is that each has a known reflectance and you can calibrate your exposure to that known figure. That makes a grey card and/or a palm every bit as effective as an incident meter and one hell of a lot cheaper.

Tim, thanks for the link. You originally posted the article before I had actually tried Manual (or even understood what it was all about) and at the time it was a bit above me. Now it makes perfect sense and a superb read - thanks again I have bookmarked it as a reference.:t::t::t:
 
Hi,

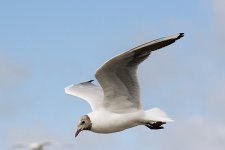
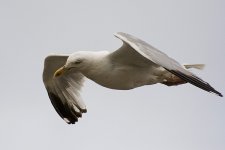
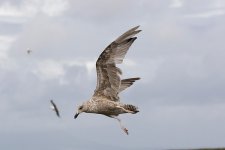
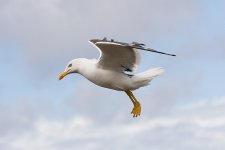
I am very new to DSLR photography, but have been quite keen to have a go at taking pictures of 'Birds in flight'. A sample of my first attempts are attached. I am quite pleased with these efforts, however I feel that the exposure could have been better on many of them. All pics were taken at ISO400 using aperture priority with a Canon 400D with a Sigma 70-300 DG lens.

I have read this thread and those linked to it concerning using manual settings and find my self getting quite confused. This is probably due to my own inexperience and ignorance of terminologies used. So this is my understanding of the methodology:

  1. Set exposure compensation to +1.1/3
  2. Set camera to AV (Aperture Priority)
  3. Take a reading of either grass or palm and remember Aperture and Shutter speed
  4. Set camera to manual and dial in the memorized aperture and shutter speed settings
  5. Return exposure compensation back to zero
If this is not accurate can someone explain the process in very simplistic terms please ;)

Regards
B
 

Attachments

  • bhg8.jpg
    bhg8.jpg
    44.1 KB · Views: 185
  • HGFlight.jpg
    HGFlight.jpg
    46 KB · Views: 166
  • immhg.jpg
    immhg.jpg
    45.8 KB · Views: 149
  • lbbg4.jpg
    lbbg4.jpg
    41.8 KB · Views: 163
Assuming you haven't edited the photos to adjust levels/curves then those exposures do not look too bad at all.

As for setting manual exposure - personally I'd just meter and adjust settings all within manual mode. Find a suitable target for metering - palm, grass, clear blue sky and dial in settings that give you an exposure indication to suit your metered target. e.g. if you meter off grass then set the meter to read somewhere between -1 to 0 on the meter, depending on the shade of the grass. Deep, rich coloured grass gets -1 as a guideline, while paler grass, perhaps a bit dried, gets nearer to 0. For a blue sky set the meter to 0. For the palm of your hand set the meter to around +1 to + 1 1/3.

You'll no doubt have to fiddle with all three of ISO/aperture/shutter speed initially to arrive at a nice compromise between all three that gives you adequate DOF, freezes motion/shake fairly well and yet also keeps noise within tolerable limits. For BIF you'll probably want something like f/8, 1/500 or faster, and an ISO that gives you those figures with the meter needle where you want it for the metered target, be that -1, 0, +1 or anything else.

Using my old favourite of the Sunny 16 Rule as a baseline, in bright sunshine you could start off with 200 ISO, f/8 and 1/800, which would be pretty sweet all round. If the conditions are dimmer then just start chipping away at the exposure settings to forsake whatever is least important. Probably you would work with ISO first of all, until you reach 800. That will buy you another two stops on the exposure. If that's not enough then begin compromising on aperture (DOF) or shutter speed (motion) to get where you need to be. Maybe you'll find yourself still up against it in difficult light and you will need to push the ISO even higher. I'd say a noisy picture is better than a blurry one, so go to 1600 if you have to. If that's still not enough then I'd give up and try again another day.
 
Last edited:
I also use manual exposure almost always .
No one has mentioned what metering mode they use -
i use spot metering 90% of the time . Thus the reading is much more accurate .
As for pre- metering , I do not meter my palm or grass .
I use all three parameters ( iso , shutter, aperture ) to adjust the exposure depending on the subject . When shooting a white heron for example - i try to get the exposure to approximately +1 or more . If i need a tad under underexposure then i aim to get the exposure bar at 0.
When shooting a dark bird - I aim to get exposure at -1 .
Shooting in raw enables mild tweaking later if needed .
Conclusion : Manual , Spot, Raw .

Here's an example :
http://www.birdforum.net/gallery/showphoto.php/photo/153722/ppuser/6414
 
Last edited:
Thanks Tim & Doc - I think the concept has finally sunk in ;)
I will have to get out and practice tomorrow, weather permitting.
 
If you have a spot meter in your camera, you can nearly always find a proper midtone somewhere around you. It's a bit harder if you have to find a bigger midtone area to meter off in some environments, especially on beaches or at sea.
 
Actually I often don't look for midtones but rather the brightest region that I want to ensure I capture without saturation. I shoot raw and expose to the right. By spot metering off the brightest/whitest part of the scene and setting that to +2 that pretty much guarantees an exposure that is in the right ballpark. There are basically 3 stops of headroom between the 0 mark and clipping, so by metering at +2 I still have a stop in reserve for hotspots or the light levels coming up just a little. In fact, sometimes, if I want to preserve full cloud detail in the sky I will meter off the brightest bit of cloud I can find and then expose that at +3 stops or even +3 1/3. I know the meter only goes to +2 in most cameras so I set the exposure to +2 and then add a further 3 clicks to get to +3. I think it is far easier to identify the brightest (important) part of a scene, and meter that, than something that is exactly equal to middle grey in tone. I find I need +2 when spot metering off a clean sheet of white A4 and that gives me an exposure that exactly matches the standard Sunny 16 exposure in brilliant sunshine. That's the same exposure as my palm at +1 1/3 stops. Having set my basic exposure in this way I will then chimp the histogram and see whether I can squeeze a little more information into my raw capture, but this is my basic metering technique.

I'm 2nd shooting at a wedding tomorrow. It's my first such gig and I have been experimenting with metering options/techniques and have settled on spot metering off the brightest part of the bride's dress and setting a manual exposure at +2 to get me good results. It seems to work well with my girlfriend's white dressing gown :) That will keep things so much simpler than shooting Av and constantly having to faff about worrying about where the camera is pointing, for metering purposes, for every wretched shot.
 
Last edited:
Agree with tdodd - a very important issue -keeping the whitest at around +2 , and trying to expose to the right .
Good remark tdodd.
 
I've just completed some slightly more controlled testing to reconfirm for myself just where the thresholds do lie. I also checked out what difference HTP makes on my 40D.

My test subject was my LCD TV screen, attached to my PC, with a pure white background for the desktop. This was to remove any chance of variable lighting throughout the short duration of the test - 45 seconds to capture all 16 test images. I sat the camera on a tripod and filled the frame with the white part of the screen only. I set ISO to 200 and aperture to f/2.8 and then tried different exposures simply by manually adjusting shutter speed. First I had HTP disabled and fired a sequence starting at +2 on the meter and then continued in 1/3 stop intervals right up to + 4 1/3. I then enabled HTP and fired off the exact same sequence of exposures again.

Here are the comparative results when viewed in DPP....

2767481018_ab32d1a398_b.jpg


The top row is without HTP and the bottom row is with HTP. It may be difficult to tell from this screen capture but I checked every frame individually and, in the top row, the first signs of clipping appear in the 6th frame, exposed at + 3 2/3 above 0 on the meter. That means on the 40D that I actually have 3 1/3 stops of clear headroom above the metered 0 point. As a side note, on my 30D, the safe zone is 3 stops and not 3 1/3 due to the higher sensitivity of the 30D at any given ISO setting. i.e. a reported 100 ISO is actually equivalent to 125 ISO and so on ,right through the entire ISO range. This is discussed in the DPReview review of the 40D, I think.

In the bottom row, with HTP enabled, the first three exposures - up to + 2 2/3 look pretty much identical to me. In the fourth exposure (at + 3 stops) there seems to be a slight hot spot (not actually blown, just hot) in the centre of the image in the top row, which is absent in the equivalent shot in the bottom row. As we progress to the right, through higher and higher exposures, the bottom row still shows a more gradual progression through light greys, without blowing out. In contrast the top row is getting more and more blown above +3 1/3 stops. Basically, with HTP enabled the image was still not blown even at + 4 1/3 over 0 on the meter. Yet lower down the tonal scale the images looked identical for practical purposes.

So I have no doubt that HTP is effective and works well when shooting raw and processing in DPP. I don't know how in camera jpegs would fare as I never shoot jpeg. I imagine the benefit would be there to see too.

Now for the bad news. I ran the same images through Lightroom 2 and as far as I could tell by eye, by histogram and by clipping warnings, there was no significant difference at all between the shots with HTP enabled and those without. In other words HTP seems to have no beneficial effect in raw processors other than Canon's own (well, not in Lightroom at any rate). Here is an equivalent screen capture from Lightroom....

http://farm4.static.flickr.com/3073/2766635453_35eee0c79c_b.jpg

On that basis I have no idea how the raw files differ with HTP on or off. How can Lightroom interpret pixels as blown when DPP knows they are not? Either a pixel is blown out, in terms of its absolute data value, or it is not. Maybe DPP is doing some kind of internal automatic highlight recovery, not available as a manual control in the software. In Lightroom it was easy enough to recover highlights with only modest amounts of highlight recovery, certainly at the + 3 1/3 and +3 2/3 exposure levels. At +4 a lot more recovery was required, and with a pure white target as the subject it's impossible to tell how effective the recovery was.

What I do know is that with a....

- 30D I have 3 stops of headroom before blowing anything;
- 40D and HTP disabled I have 3 1/3 stops of headroom before blowing anything;
- 40D and HTP enabled I have 4 1/3 stops headroom, and maybe a fraction more, although I stopped testing at + 4 1/3, so I don't know the upper limit.

I leave it up to you to do with that information what you will :)
 
Last edited:
Nice thread, you got me thinking and thats something.......
Will try a bit of metering in manual, and see if I can learn a bit more in the manual mode.
 
Now for the bad news. I ran the same images through Lightroom 2 and as far as I could tell by eye, by histogram and by clipping warnings, there was no significant difference at all between the shots with HTP enabled and those without. In other words HTP seems to have no beneficial effect in raw processors other than Canon's own (well, not in Lightroom at any rate). Here is an equivalent screen capture from Lightroom....

http://farm4.static.flickr.com/3073/2766635453_35eee0c79c_b.jpg

On that basis I have no idea how the raw files differ with HTP on or off. How can Lightroom interpret pixels as blown when DPP knows they are not? Either a pixel is blown out, in terms of its absolute data value, or it is not. Maybe DPP is doing some kind of internal automatic highlight recovery, not available as a manual control in the software. In Lightroom it was easy enough to recover highlights with only modest amounts of highlight recovery, certainly at the + 3 1/3 and +3 2/3 exposure levels. At +4 a lot more recovery was required, and with a pure white target as the subject it's impossible to tell how effective the recovery was.
I've read on another forum that Lightroom will just blindly boost the rendered image by 1 stop if it sees the HTP flag on. It does not perform Canon's litle trick with a fancy tone curve. This explains the identical results in Lightroom, whether HTP is on or off. The camera underexposes by 1 stop and Lightroom adjusts the whole thing up by one stop. Thus you may have saved your highlights but only by underexposing in the first place and wasting half your data points.

The bottom line from all that, in my opinion, is that using HTP is fine if you have difficult lighting or cannot meter very accurately for some reason, but it is actually pretty worthless and does more harm than good if you are able to nail your exposure accurately in the first place. I can't see me using HTP much at all.
 
Last edited:
Hi Roy.

Good advice given already about BIF but just a couple of more things to consider. It is very difficult taking shots into the light and getting the exposure right, always plan to shot out of the light.
The best time of day is morning or evening when the sun is low. The sun directly above will cast a shadow and detail will be lost.

Manual shooting is easy (honest) and when you get use to it you'll never use any other mode. Just remember you need a fast shutter speed and over-expose by a stop or two if your shooting into the sky.
 
Warning! This thread is more than 16 years ago old.
It's likely that no further discussion is required, in which case we recommend starting a new thread. If however you feel your response is required you can still do so.

Users who are viewing this thread

Back
Top