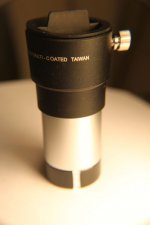
In another thread in this section, Bjorn, who uses a Pentax XW 14 mm eyepiece in his Pentax PF-65EDAII spotter, posted a question about whether or not folks would recommend obtaining a Pentax 10 mm XW eyepiece for occasional higher power views. In my opinion, IF cost, weight, and bulk are NOT considerations, the shorter focal length Pentax XW’s are a good solution - - but since the PF series of spotters take standard 1-1/4” eyepieces, a VERY low cost and light weight alternative solution is to get an appropriate Barlow lens to use WITH the 14 mm XW.
Agena AstroProducts (and likely other suppliers, too) sells the GSO 1.25” 2x Achromatic Barlow lens (#GS2BL) for $33.00 U.S. For folks with normal (or corrected) vision, my PF-65EDAII focuses the image of an object at infinity using just the 14 mm XW at about 5/8 of a turn of the focusing knob from full “in” position. Using the unmodified GSO Barlow with the 14 XW in the scope will allow focus of the image for infinitely distant objects for folks with normal vision, but to do so, the focus knob must be nearly to the full “in” position. This does not allow optimal “in” adjustment for folks who are even a little bit myopic without their glasses. Fortunately, there are a couple of “work-arounds” that WILL enable better use with this Barlow. (Clearly closer objects will focus OK if the infinity objects will focus, since there is a lot of “out” travel available.)
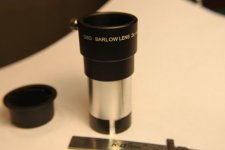
The GSO Barlow screws apart into three pieces: a top section to hold the eyepiece with securing thumbscrew, a 1.25” diameter connecting barrel, and a lower cell containing the Barlow lens. The first “work-around” requires no mechanical modifications. Just detach the Barlow lens cell from the bottom of the GSO unit and screw it directly into the bottom of the Pentax 14 mm XW. The threads are the same (metric, .60 mm pitch). This yields about 40x, as compared to 27x with the 14XW alone. I determined this magnification with my scope by measuring the exit pupil of the combination with a caliper and magnifier and divided the scope aperture (65 mm) by that value. This arrangement focuses the image for an object at infinity with the focusing knob about 7/8 turn from full “in” position – so even more “in” focus is available than with the XW eyepiece alone! The “Barlow factor” when the cell is attached directly to the 14XW is about 1.48x rather than 2x. The disadvantage of this method is that to change power, you need to screw the small Barlow element onto the end of the eyepiece while out in the field.
The second “work-around” method is to replace the middle threaded barrel section of the GSO Barlow with a shorter one. Surplus Shed in Blandon, PA, USA has anodized aluminum barrels of the correct diameter and thread pitch, needing only to be cut to length. This replacement barrel, Surplus Shed Item No. M2104, sells for $4.00, U.S. If you are not familiar with cutting tubes, you may want to order two in case you spoil one or for further experimentation. Of course, you could also just cut down the original GSO barrel, but then could not return the Barlow to its original function for use with other telescopes. The original and Surplus Shed barrels are about 30 mm long and I cut mine to ¾” (19 mm) for use with the Pentax PF scopes. I have used one shortened on a lathe for several years, but did not post about it before because most birders don’t have access to a lathe to make their own. In an attempt to make this modification possible for more folks, I recently made another “cut down” GSO Barlow WITHOUT using my lathe. You’ll need a scriber, a hacksaw or jeweler’s saw with a fine blade, a fine cut mill file, and a vise. Instructions follow:
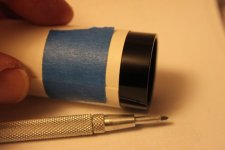
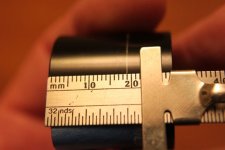
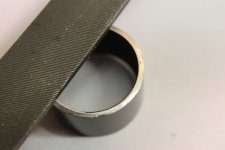
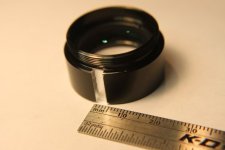
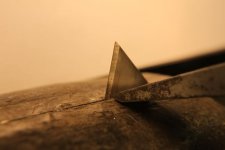
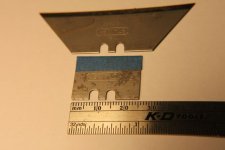
1. Wrap a piece of paper or thin card stock around the 30 mm long barrel so as to form a perfect circumference with the edge of the card 19 mm (3/4”) from one end of the barrel. I used a 3 x 5” note card and taped it to the barrel so 19 mm was covered and then taped the card to itself to hold the wrapped card in place. Using a sharp scriber, mark a line around the barrel along the paper edge. Remove paper. See photos 1 and 2.
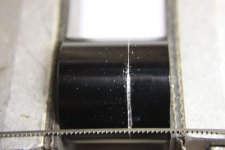
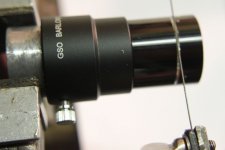
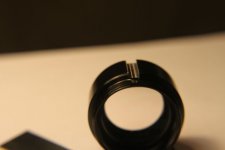
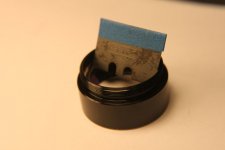
2. Holding the barrel crosswise in a padded vise, use a fine hacksaw or jeweler’s saw to begin cutting on the line. Do not go through the barrel wall, but once the saw kerf is established, loosen the vise and rotate the top of the barrel a little towards you. See photo 3. Retighten and with the back of the saw blade in the established kerf, extend the cut forward a little with each stroke, keeping on the line. Have patience, stay ON the line, and continue this procedure a bit at a time until a shallow groove extends all the way around the barrel. Then continue lightly cutting and rotating until the 19 mm section is about to part off. To conveniently finish the cut without pinching the saw blade, screw the end of the nearly cut tube onto the upper thicker eyepiece-holding section of the Barlow and use its screw to secure the whole thing to a thick 1.25” piece held in the vise. I used an old, discarded eyepiece barrel for this piece. You can now continue sawing around the tube to finish parting off the 19 mm long piece with light saw strokes. See photo 4.
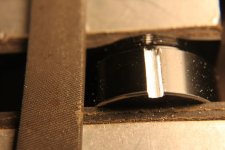
3. Using a fine file, smooth any irregularities to complete your new short Barlow midsection barrel. See photo 5.
4. Screw the eyepiece holder part into the end of the shortened barrel and the Barlow cell into the other end. Done!
With my PF-65EDAII, the 14 XW eyepiece in this modified Barlow focuses the image of an object at infinity with the focuser knob ¼ turn from full “in” position and gives 52x with a Barlow factor of about 1.9.
By the way, this moving of the position of the Barlow lens is not a new idea. When Frank Goodwin first popularized Barlow lens use in the US over 60 years ago, his lenses were a friction fit in the tube and came with instructions and a little stick to push the lens cell into position to provide different magnifications. Edmund Scientific sold the Goodwin Barlow after Mr. Goodwin’s death. Edmund’s Goodwin Barlow instructions are still available for download on their Anchor Optics site. Check it out.
I’m pretty sure that the image quality using the Barlowed 14 XW is not as good as would be provided by using just a single, shorter FL Pentax XW eyepiece, but I am unable to see any difference in casual viewing. Close equivalents to the two Barlowed XW 14 magnifications are a 10 mm XW (giving 39x rather than 40x) and a 7 mm XW (giving 56x rather than 52x). Another benefit of having the GSO 2x Barlow is that with the lower lens cell removed and the original connecting barrel in place, the empty Barlow tube will function as an extension tube for your 14 XW, allowing closest focus for the PF-65EDAII to move from 5 meters to just 2.5 meters – in case you want a really magnified view of a hummingbird at your feeder.
A GSO 1.25” Barlow shortened and used as described for the PF-65EDAII also works similarly with other eyepieces. The method of screwing the Barlow element cell directly onto the eyepiece can also be used in the larger Pentax scopes of the PF series, the PF-80 and PF-100. Unfortunately, it is more complicated to modify the GSO Barlow to use the second method for those scopes. I’ve succeeded in getting the PF-80 and PF-100 to focus the image of an object at infinity with the focus knob about 1/8 turn from full “in” position - but only by trimming both the top of the upper eyepiece-holding part to allow the eyepiece to sit closer to the Barlow AND trimming a bit of the excess rim off the bottom of the Barlow lens cell so that the lens itself will sit closer to the objective. These modifications would be difficult for those without access to a metal lathe. Additional difficulties with the larger scopes arise because the full aperture appears to be slightly diminished in them, so calculating magnification is harder. The PF-65EDaII objective is not vignetted at all, so one can just use 65 mm and divide by the measured exit pupil to find magnification. (By the way, is anyone else bothered by the fact that the focus knob on the PF-65EDaII turns the opposite way for close focus as compared to the larger PF scopes?)
For those who have a PF-65EDAII scope and are considering purchasing a single Pentax XW eyepiece, to be used with this Barlow method for higher powers, an XW 20 mm might be even more versatile than the 14 XW, with magnifications of 19.5x, 29x, and 37x. Spending just $33 for the Barlow and $4 for the extra tube, you can’t go too far wrong.
- Bill


