• Welcome to BirdForum, the internet's largest birding community with thousands of members from all over the world. The forums are dedicated to wild birds, birding, binoculars and equipment and all that goes with it.

    Please register for an account to take part in the discussions in the forum, post your pictures in the gallery and more.
ZEISS DTI thermal imaging cameras. For more discoveries at night, and during the day.

Binocular Repairs and Cleaning (2 Viewers)

Thanks ON, I remembered your tip on removing nicotine for this one, it had so much brown goo, I gave up careful cleaning with alcohol and gave it a good wash with detergent, a sponge, and hot water, got it all off a treat. No lens coatings to worry about on this one. Re-coating the metal takes a lot of patience, I usually use a tiny bit of metal filler on the small dinks, use my finger to smooth it in, then when dry rub smooth with fine paper, being careful not to damage the paint that is ok, then maybe touch in or sometimes I mask off the white letters and carefully and lightly spray the edges black, then when dry, give all the metal parts a coat of clear lacquer to get it as near uniform finish as I can. Often it goes wrong and I have to start over. Objective rims I usually just clean right off to the metal and re-spray them.
 
Last edited:
Could that stuff be put on an older Nikon 8x30 EII like mine which chronically suffers from "loosening leatherette" covering?:smoke:

Bob

Bob, it depends how bad your covering is, personally I would only use this on a binocular where the original covering is worn away or gone beyond repair, in sort of nothing to lose situations. I think it would cover them ok, bit tricky to work with, and you may need to leave space at the edges so the prism cover plates slide back on, so careful measuring and best to make a paper template first, either from the old covering or fitting on the body.
Ben

Thanks Ben,

I was thinking that it would be pretty hard to work with. I guess I'll keep touching it up with LocTite where it bubbles up and gets loose.

Bob
 
binocular repair

Had a great time last night reading through all the various remarks on binocular repairs,cleaning, renovation,tools ,care and patience required and much more - whilst daunted by it all I am at last encouraged to take the plunge. Special thanks to O.N and Bencw amongst others. I have quite a sizeable collection of old military, just love the Ross and the Bausch and Lomb and whilst they are nothing special I love to use them. If binoculars could talk what stories they could tell!However, MANY of them were cheapies at auctions and car booties and show major signs of being beaten up. I suppose I like to think of myself as a binocular rescuer rather than restorer I like to take them back to their brass origins ( sorry to the dedicated military collector) since I reckon they look a great talking point, cosmetically pleasing AND still VERY useable and great fun. To add, will certainly outlast many of the Japanese and chinese sets for sale.Could really do with ANY help regarding issues to look out for, problems that I will encounter, just about anything on a learning curve basis, on B and L 6 x30, Ross Sterio x6, Kershaw Mk2 or 3, Taylor Hobson Mk11, ( all individual focus). Is it worth investing in a dremel drill for cleaning up the outside and the an airbrush kit for paint spraying?Have recently bought the Seyfried book so will be burning the midnight oil with that, want to have a go at the collimation set up! Have in the past had really great repair work done by the pro's but now being retired I have to watch the pennies a little more, so any comments will be warmly welcomed and appreciated.
Love the site - and great ideas from all directions and hope to contribute.Only joined last night so please bear with my excitement at it all.
 
I started out with some irretrievable binoculars, broken focuser arms and such.
Really cheap 'junkers' provide useful experience.

Individual focus is great for the restorer.
Much simpler, more precise, more reliable.
I pull the setscrews on the crown, pull off the crown,
wet the greased threads (assuming the action is really stiff) lightly with WD40,
and slowly turn the ocular out with a napkin. Then the threads need degreasing in more
napkins, then some fresh motorcycle bearing grease. Pulling the focuser crown off can be a puzzle
sometimes...it takes patience for some, not hard pulling. I use a street sign now for collimation.
It glows back at my livingroom at night with no lights around. A small solid target with a featureless
background does pretty well.

Anyway, take it slow and it will be fun. There is skill required, but the parts count
and wear'n'tear aren't bad at all compared to things like cars or motorcycles or washing machines.
Make sure you get your optical spanner and fine screwdrivers, and
if you work with a lot of military stuff, something to use as a pin wrench.
 
Solvents are an interesting topic (for cleaning)..
I use a lot of 91% IPA (Isopropyl Alcohol)
Others swear by acetone. It is stronger, but I find
it really irritating. When I do use it, like on stubborn
skin/tear gook or grease residue, I use fingernail polish
remover. Sounds crazy, but it has acetone and a little
lanolin, which keeps the gick and grease residue
from hardening again, and is very soluble in the 91% IPA.

So for that crusty-tears stuff at the edge of the oculars,
it's damp-fingernail-polish-remover followed by damp-swab-IPA.
 
Welcome Kyote

Hi Koyote, and welcome. It can be frustrating at times and patience is needed, sometimes if something is proving difficult I find it better to walk away and come back fresh to it next day, but it is very satisfying to restore an old binocular to something near former glory, and some of those WW11 binoculars give a stunning view. I also find them easier to work on than later binoculars, once you have managed to get old screws and threads unstuck anyway !! I usually use car spray "rattle" cans of paint. You can buy matt, gloss, primer and clear lacquer cans in the 99p shop and it gives a good finish, as well using a brush to touch in small blemishes. You can polish the matt up to a satin finish using a car polish, like autoglym. Just be careful not to use enamel based paint with these cellulose or acrylic sprays as it will react and bubble up. I made a collimation scope as per Seyfrieds book, (see photo) fairly simple, I used an old wine bottle box for the target / light box and bought an old scope for £10. Get the lowest power scope you can, 2x is about right.
One thing I learned, I have limited space, so I built it on a plinth, as you see, it is ideal for 8x30, 8x40 etc but I struggle to fit a 7x50 0n it, and anything bigger is impossible, so if you can, build it on a bigger platform, a bench is ideal, so you have plenty of space to work on the binocular. The other thing to note is that to simulate the distance, you actually mount the binocular the other way round, so you look through the scope into the objective end, Seyfried does not mention that. Like Optic-Nut, I often use a street lamp initially and find I can get it pretty much spot on with that. Good luck and happy restoring.
 

Attachments

  • COLLIMATOR-P302.JPG
    COLLIMATOR-P302.JPG
    55.5 KB · Views: 109
Last edited:
sometimes if something is proving difficult I find it better to walk away and come back fresh to it next day

Indeed...the minds works on things in the background, and forging on can contribute to the junker pile
at times like that!
 
Thanks for all of that O.N and bencw and sorry for delay in acknowledgement. Familiy wedding over the week end which took over events though I did manage to scrounge a 4x28 scope for the collimator ( 8" long so will that be OK or too short?) and then the promise of a 2nd edition Hans Seeger book and, things happen in 3's, an arranged viewing/purchase of a Barr and Stroud Admiraly set of CF25, so a productive couple of days. Thanks Bencw for the picture, certainly would have escaped me to position the bins that way around ( a picture paints a 1000 words!) One thing also alludes me - is there a technique to retaining the white inscriptions when/if doing a total respray job of the binocular ( again, sorry to the discerning collector) On the case with the spanner wrench and then - here's hoping, away I go! A lot of P.C required, patience and confidence.:t:
 
Thanks for all of that O.N and bencw and sorry for delay in acknowledgement. Familiy wedding over the week end which took over events though I did manage to scrounge a 4x28 scope for the collimator ( 8" long so will that be OK or too short?) and then the promise of a 2nd edition Hans Seeger book and, things happen in 3's, an arranged viewing/purchase of a Barr and Stroud Admiraly set of CF25, so a productive couple of days. Thanks Bencw for the picture, certainly would have escaped me to position the bins that way around ( a picture paints a 1000 words!) One thing also alludes me - is there a technique to retaining the white inscriptions when/if doing a total respray job of the binocular ( again, sorry to the discerning collector) On the case with the spanner wrench and then - here's hoping, away I go! A lot of P.C required, patience and confidence.:t:

Hi Koyote,
8" is fine for the scope, the Hans Seeger book sounds a good find. In respect of the white inscriptions, this can be tricky. If they are still good and it is just the edges of plates that need paint, I mask off the white inscriptions and carefully spray, then take the masking off and give it all a clear lacquer.
If that is not possible, it's more difficult, as long as the inscription is engraved, in indentations, I spray the whole part black, let dry, use a sharp pin to scratch out the engravings and let the black coating dry hard, a few days. Then using white emulsion and a small brush, paint in the lettering, scrape off excess with card, it will leave some white smears, leave it just long enough to dry, and then you should be able to wipe of the emulsion smears with a damp cloth or a little cleaning alcohol, leaving the inscription white. Then spray all over with clear lacquer. One thing to keep in mind, most collectors like Military binoculars, untouched, with all their battle scars as it were, I prefer to get mine back to looking as good as I can, but if it was a rare and valuable binocular, like for example a BIC U Boat 8x60, or kriegsmarine 7x50 servicing may be fine but I think best leave the cosmetics alone.

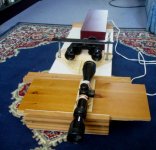
Also, probably obvious, but work over a table when dismantling or assembling, and cover the table with one of those soft fleecy type car blankets, then if you drop a small screw, it won't bounce onto the floor, and if you drop a prism it probably wont damage it.
 
Last edited:
Rubbing over the engraving with a white wax crayon and the wiping the surplus off is another method if you do not fancy the paint.
 
Bencw is in training to do restorations at the Louvre ;-) ... kidding.
Awesome stuff.

Ha, nice one ON, funnily enough, the first restorations I did, years back, was to restore damaged antique pottery and porcelain.

I like Gary's crayon idea, much easier and has made me wonder if white chalk would work, then using some kind of fixative on it or over lacquer it?
 
cleaning porros inside

Thanks for everyone's helpful advice.

I am going to take the plunge with my Kowa 10X50's which are mindblowing to look through but are very hazy.

Question One:
The prisms look very snugly slotted into recesses. Do prisms on well-made glasses tend to go back in the way they were without affecting alignment? (I suppose there's only one way to find out!)

Question Two:
The body is a one-piece, so this eliminates the variable of barrels that unscrew.
Do you think that if I made a jig to mark carefully the position of the eccectric rings as they are now, that I could also avoid realignment that way (supposing that the answer to #1 was a yes).

Many thanks
 
Question One:
The prisms look very snugly slotted into recesses. Do prisms on well-made glasses tend to go back in the way they were without affecting alignment? (I suppose there's only one way to find out!)

Question Two:
The body is a one-piece, so this eliminates the variable of barrels that unscrew.
Do you think that if I made a jig to mark carefully the position of the eccectric rings as they are now, that I could also avoid realignment that way (supposing that the answer to #1 was a yes).Many thanks

Hi,
1. The answer generally is yes. On well made porro's they will usually snap right back in the recess, just mark the outside side of the prism in pencil with an 0 when you take it out, then you will be sure to put it back the same way round. Do one side at a time, and when you have put them back, just look through that side at a door jam and if it appears straight you should be ok.

2. What I usually do, with the one piece or US pattern, is to take off the beauty ring, then with tipex, put a dab on the side in a place which the beauty ring would cover, lined up with the notch in the eccentric ring, then same with the opposing notch. You may be able to unscrew the whole objective cell without taking out the retaining ring or eccentric ring, clean it inside and screw back to line up with the white dabs.
You could also put some masking tape on the body and make a pencil mark on the tape.

One other thing, I have in the past had my spanner wrench slip when undoing a stubborn objective ring and mark the lens, be careful it is in firmly, also I now have a selection of cardboard circles to fit various objectives and just put one over the lens before undoing. Those round pads that ladies use to remove their make up are useful for covering the lens too.
 
Last edited:
Porrofan wrote: "The prisms look very snugly slotted into recesses. Do prisms on well-made glasses tend to go back in the way they were without affecting alignment? (I suppose there's only one way to find out!)"

I have worked on old Zeiss binos on which the edges of the prisms had been slightly etched with a jeweler's file, and the prism shelves had been center punched to match those etchings. Thus, one prism would only fit in one direction of one position--those guys sure knew how to keep away from the Russian Front. Still, while the instrument was almost always "serviceable," alignment was left to "conditional alignment," using the observer's spatial accommodation, and not true 3-axis collimation.

Just a thought,

Bill
 
Eccentric front rings cover most old binoculars, but there are some weird schemes.
Foil shims under prisms happen, with or without eccentric fronts, for collimation.
The punch-wedged prisms occur in some US WW2 stuff and Japanese stuff too.
The way Wollensacks were screwed and glued it looks like they didn't
worry about seeing them again. There have been some strange ones..

Good thing you noticed the scheme.
 
Warning! This thread is more than 9 years ago old.
It's likely that no further discussion is required, in which case we recommend starting a new thread. If however you feel your response is required you can still do so.

Users who are viewing this thread

Back
Top